
The Complete 2026 Base Makeup Guide: How to Choose and Apply Foundation, Concealer & Primer for a Flawless Finish
The Complete 2026 Base Makeup Guide: How to Choose and Apply Foundation, Concealer & Primer for a Flawless Finish
The way your makeup looks at 8 PM is almost entirely determined by the decisions you made before you even opened your foundation. Base makeup — primer, foundation, and concealer — is the engine of your entire look, and it is also the category where most people are quietly working against themselves without knowing it. The wrong shade oxidizes and turns orange. The wrong formula separates on oily skin or clings to dry patches. Concealer applied over bare skin creates a masked, heavy finish. These aren't product failures — they're technique and formula mismatches, and they're all fixable.
Whether you're new to makeup, rebuilding your routine after years of going through the same motions, or simply tired of a base that doesn't hold up past noon, this guide covers everything you need to build a seamless, long-lasting base in 2026 — the kind that looks like your skin, only better.
Understanding the Base Makeup Trinity
Before getting into application, it's worth understanding what each of these three products is actually designed to do — because they're not interchangeable, and they each perform their best work when used in the right sequence with the right formula match.
Primer is your preparation layer. It creates a smooth, adhesive surface for foundation to grip, addresses specific skin concerns like enlarged pores or excess oil, and dramatically extends wear time. Think of it as the scaffolding your makeup builds on.
Foundation is your coverage and color-correction layer. It evens out skin tone, conceals general redness or discoloration, and sets the overall finish — whether that's dewy, matte, or natural-skin. Foundation handles the broad canvas.
Concealer is your precision tool. Where foundation manages the whole face, concealer goes to work on the specific areas that need more targeted attention: dark circles, blemishes, redness around the nose, and any spots where foundation alone fell slightly short.
Together, these three products — applied in the right order, using the right formulas for your skin type — create a base that looks like skin rather than makeup. That distinction is everything.
Prep Your Skin Before You Open Anything
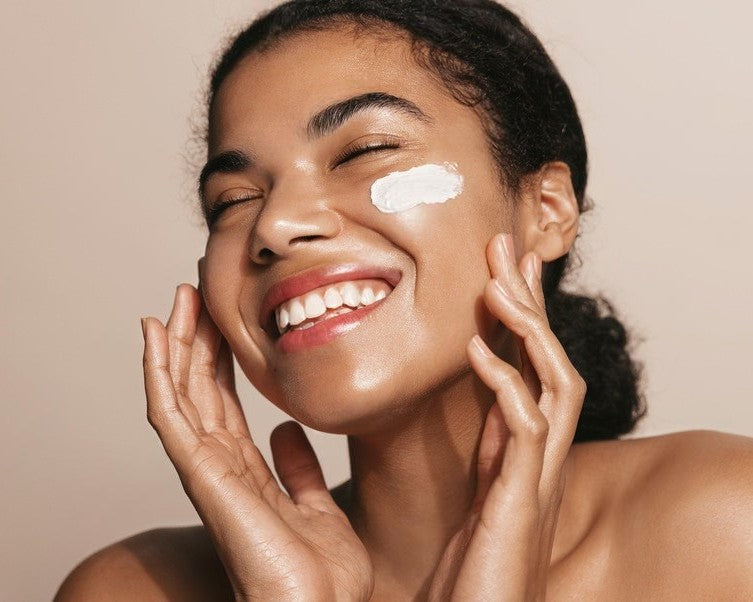
The single most overlooked step in base makeup application happens before the makeup even comes out: skincare prep. Dry, dehydrated skin grabs onto powder foundation and visually amplifies texture. Skin with a compromised moisture barrier causes liquid foundation to slide, separate, and break down within hours.
Complete your morning skincare routine — cleanser, toner, serum, moisturizer, and SPF — and give everything five to ten minutes to fully absorb before you reach for any makeup. Skin that is balanced and hydrated, but not tacky or visibly wet on the surface, gives your base makeup the best possible surface to adhere to and perform on.
For dry skin specifically, this step is non-negotiable and often makes a more visible difference than any product upgrade ever could. For oily skin, use a lightweight oil-free moisturizer rather than skipping hydration entirely — adequately hydrated skin actually produces significantly less sebum as the day goes on.
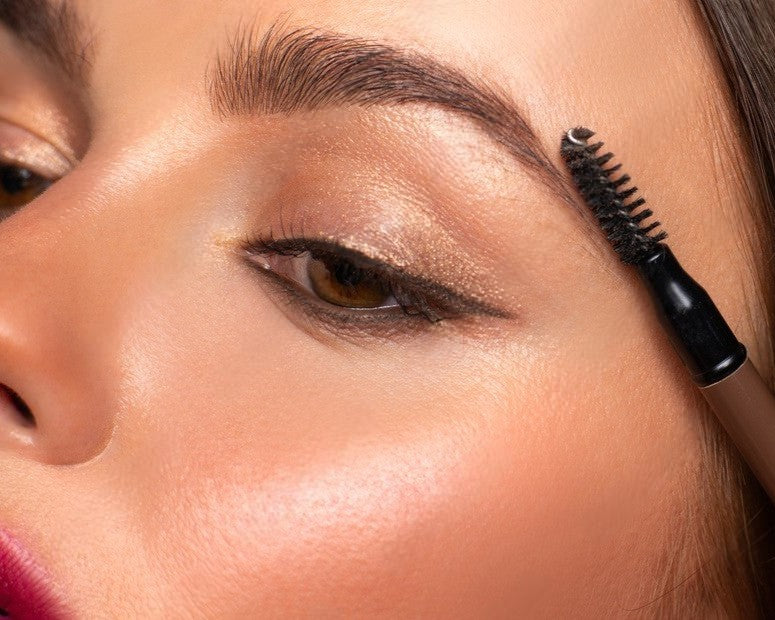
Step 1: Choosing and Applying the Right Primer
Primer is not one-size-fits-all, and using the wrong type for your skin can actually make your makeup look worse rather than better. Here's how to match your primer to your skin's specific needs.
Pore-minimizing primers fill in the appearance of enlarged pores and smooth uneven texture. These are typically silicone-based and work beautifully under liquid or powder foundations — especially in photographs.
Mattifying primers control oil production and keep shine in check throughout the day. They're ideal for oily and combination skin types and help powder and liquid formulas stay put through long hours and warm weather.
Hydrating primers add a dewy, moisturized quality to the skin before foundation goes on. They're ideal for dry skin types and anyone who wants that lit-from-within, glassy foundation finish.
Color-correcting primers come in green (to neutralize visible redness), peach or lavender (to brighten dullness or sallow tones), and lilac (to counteract yellow undertones). Apply color-correcting primer only to the areas that need it rather than all over.
One important formula note that trips up many people: silicone-based primers work best under silicone-based foundations, and water-based primers pair better with water-based foundation formulas. Mixing incompatible formulas causes pilling, separation, and poor wear throughout the day. If dimethicone appears near the top of either product's ingredient list, it is silicone-based.
Apply primer with clean fingertips, pressing it gently into the skin rather than spreading it. Focus on the T-zone, around the nose, and any areas with texture concerns. Allow it to set for two to three minutes before applying foundation — this brief wait matters more than most people realize.
Step 2: Finding Your Perfect Foundation Shade
This is where most people struggle the most — and where the difference between a foundation that looks naturally seamless and one that looks obviously painted on is made or lost.
Start with your undertone. Foundation shade matching is not just about light versus dark — it's about the underlying warmth or coolness in your skin that must match for foundation to disappear naturally. Warm undertones have yellow, golden, or peachy casts. Cool undertones run pink, red, or bluish. Neutral undertones are a balanced mix of both.
To identify your undertone, look at the veins on the inside of your wrist in natural daylight — not under yellow indoor lighting, which distorts color dramatically. Green-tinted veins suggest warm undertones. Blue or purple-tinted veins suggest cool undertones. If you see both, you're likely neutral.
Test foundation on your jawline, not your wrist or the back of your hand. The goal is a shade that visually disappears into your jaw in natural light — not a shade that matches your inner arm or makes your face look lighter or darker than your neck. The jaw test is how professional makeup artists shade-match, and it's the most reliable method.
Coverage level is a separate decision from shade. Sheer coverage lets your natural skin show through for the most effortless, barely-there finish and works best for relatively even skin tones. Medium coverage — far and away the most popular category — blurs most discoloration while still looking believably like skin. Full coverage addresses significant hyperpigmentation, redness, or scarring, and is generally most effective when used selectively in specific areas rather than all over the face.
For online shade matching, look for brands that publish detailed shade descriptions alongside their swatches, and spend time reading reviews from people who describe their skin tone and undertone similarly to yours — they are your most accurate reference point.
Step 3: Foundation Formulas Explained
Once you've identified your shade, the formula you choose determines how your foundation performs and wears throughout the day.
Liquid foundation is the most versatile and widely available category and comes formulated for every skin type, coverage level, and finish. Lightweight, serum-textured liquids work beautifully on dry skin. Oil-free, buildable formulas are the reliable choice for oily skin. Most people have at least one liquid foundation in their routine.
Powder foundation is convenient and genuinely excellent for oily skin — it provides coverage and oil control in one step. However, it can settle into fine lines on mature skin and visually emphasize dry patches if used on dehydrated skin without proper moisturizer prep.
Stick foundation offers full coverage and easy portability, and can be blended out with a damp sponge for a natural finish or built up for more intense coverage. It tends to run warm on very oily skin, and application with clean fingers often gives a better blend than trying to swipe it directly.
Skin tint and serum foundation represent the 2026 skin-first philosophy — extremely lightweight, skin-matching formulas that blur rather than fully conceal. They're ideal for confident skin days, warm weather when heavier formulas feel uncomfortable, or anyone who prefers a barely-there, real-skin finish.
Consider owning two foundation formulas rather than relying on one: a lightweight everyday option for regular days and a fuller-coverage formula for occasions that warrant more polish. Many people find this two-formula approach far more flexible than trying to find a single product that does everything.
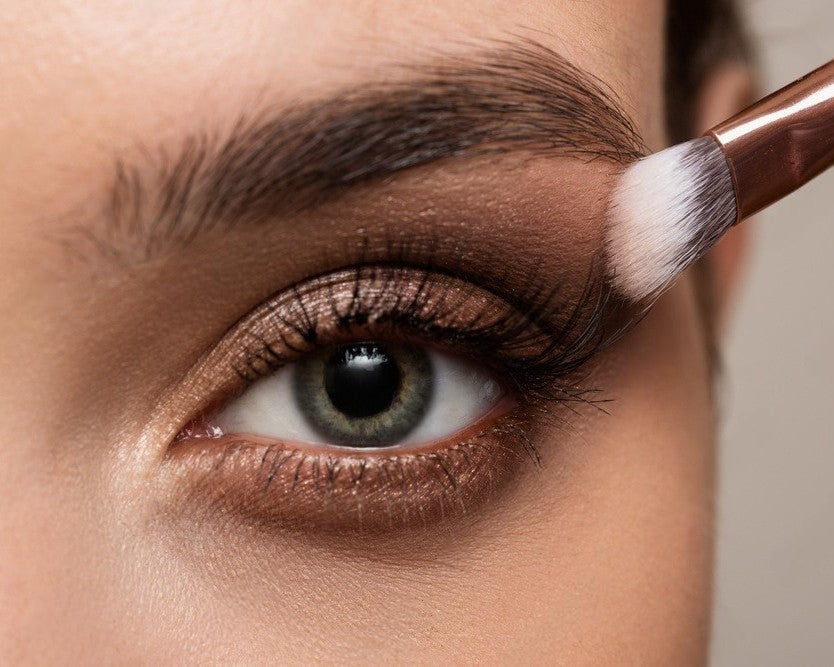
Step 4: How to Apply Foundation Like a Pro
The tool you use to apply foundation changes the finish you'll get — more than almost any other variable.
A dense buffing brush builds the most airbrushed, full-coverage result and works exceptionally well with medium to full-coverage liquids and powders. A damp beauty sponge pressed — not wiped — into the skin creates a natural, skin-like finish and is excellent for blending harsh edges and achieving that seamless second-skin look. Clean fingertips are often underrated, especially for lightweight formulas and skin tints, because the warmth of your fingers helps melt the product into the skin seamlessly.
The most common foundation application mistake is using too much product and applying it in swiping or wiping strokes. Instead, start with a small amount — roughly a pea-sized portion per cheek zone — and build coverage only where you genuinely need it. Concentrate more product in the center of the face where most redness and discoloration lives, and use a lighter hand at the hairline, temples, and jaw. Always blend down your neck so there's no visible demarcation line between your foundation and bare skin.
Step 5: Concealer — When, Where, and How
This is one of the most counterintuitive techniques in makeup: most professional artists apply concealer after foundation, not before. Foundation alone covers a significant portion of what you initially thought required concealer, which means you end up using less product overall and achieving a lighter, more natural-looking result. Less is genuinely more.
Under the eyes: choose a concealer one to two shades lighter than your foundation to brighten the area. Apply in an inverted triangle shape pointing toward your cheekbone — not just directly under the lower lash line — and blend gently with a damp sponge using pressing motions. If you have significant darkness or deep discoloration, a color-correcting concealer applied first makes a dramatic difference: peach or salmon tones counteract the blue-purple darkness most commonly seen under eyes, while deeper orange-red tones work best on darker, melanin-rich skin tones.
On blemishes: use a shade that matches your foundation rather than going lighter, which draws more attention to the spot. Apply with a small, flat brush for precision, and pat rather than swipe to avoid disturbing the surrounding foundation.
Setting concealer is critical to preventing creasing throughout the day. Gently press a small amount of translucent or color-matched setting powder over your concealer using a fluffy brush immediately after application. If you want a more baked, long-wear effect, press the powder on generously, allow it to sit for five to ten minutes, then sweep away the excess — this technique sets the concealer like a sealant.
Setting Your Base for All-Day Wear
Two products compete for the final step of a base routine, and understanding the difference between them is what takes a base from decent to exceptional.
Setting powder — whether translucent or color-matched — physically presses the base down and controls shine and movement. It's particularly important over concealer to prevent creasing and across the T-zone for oily skin. It also slightly mutes foundation's finish, which matters less for matte formulas but is worth considering if you're using a dewy foundation and want to preserve that luminosity.
Setting spray does something fundamentally different: it fuses your makeup layers together, melts away any powdery or layered appearance, and binds the entire base to your skin for extended wear. Think of powder as the lock and setting spray as the key that seals the whole system.
For maximum longevity, use both strategically: set your concealer with powder where needed, finish the face, then mist setting spray from approximately 20 centimeters away in an X and T pattern across your face. Let it dry completely on its own — do not fan it or touch your face — and your base will hold through most of what the day throws at it.
The Base Makeup Mistakes Everyone Makes
Buying foundation without testing it in natural light, because store lighting is specifically designed to be flattering and is one of the most deceptive environments for shade matching. Choosing a shade that's close but makes your face visibly lighter or darker than your neck, which draws more attention to your makeup rather than away from it. Using too much concealer under the eyes, which paradoxically emphasizes rather than covers fine lines by sitting in them. Skipping primer and then wondering why foundation wears unevenly or disappears in certain areas by midday. Setting everything with too much powder, which creates a flat, mask-like finish that photographs noticeably.
Perhaps the most important mistake to correct is treating base makeup as a rigid formula applied the same way every single day. Your base should respond to your skin on a given day — lighter and more natural when your skin is behaving, slightly more strategic and precise when it isn't. Flexible technique beats any product purchase.
Quick Reference: Base Makeup by Skin Type
For oily skin, build your base around a mattifying primer, an oil-free liquid or powder foundation with a matte or satin finish, and setting powder concentrated in the T-zone followed by a long-wear setting spray.
For dry skin, prioritize a hydrating primer, a lightweight liquid foundation or skin tint with a dewy finish, and either a very light dusting of setting powder or none at all — finishing with a luminous or dewy setting spray to preserve the glow.
For combination skin, treat each zone appropriately: mattify where you're oily, layer lighter coverage where you're dry, and blend the middle ground. A targeted rather than all-over approach to both primer and setting powder makes the biggest difference.
For sensitive skin, look for fragrance-free, non-comedogenic formulas with short, minimal ingredient lists. Mineral-based foundations — those using zinc oxide or titanium dioxide — are often the most tolerable choice and do double duty as a light SPF layer.
Your base makeup is not about hiding who you are — it's about creating the clearest, most even canvas possible for whatever you want to express with color, highlight, or dimension. When your base is right, everything else sits better, lasts longer, and photographs beautifully.
Ready to find your perfect base? [Explore the full Everbeaut makeup collection →]
Written by Jake Mitzkovitz
