

The Complete 2026 Sunless Tanning & Body Bronzing Guide: Flawless Glow Without Sun Damage
The Complete 2026 Sunless Tanning & Body Bronzing Guide: Flawless Glow Without Sun Damage
Summer is here — and that sun-kissed, bronzed glow is absolutely everywhere. But here's what most beauty brands won't tell you: the best-looking tans in 2026 aren't coming from the sun. They're coming from smart, streak-free sunless tanning routines and next-level body bronzing techniques that give you all the warmth and radiance of a real tan with zero UV damage, zero premature aging, and zero regret.
Whether you're new to self-tanners or you've had a bad experience with orange streaks and patchy fading, this guide is your complete reset. We're breaking down everything — from prep and application to the best bronzing techniques and maintenance tips — so you can step into summer with a glow that looks genuinely, effortlessly sun-kissed.
Why Sunless Tanning Is Having Its Biggest Moment Yet in 2026
The shift away from sun tanning has been building for years, but 2026 is the year it's truly mainstream. Dermatologists, estheticians, and beauty editors are all saying the same thing: the risks of UV exposure — premature aging, hyperpigmentation, and long-term skin damage — simply aren't worth a temporary tan.
Sunless tanning technology has also come a long way. Today's self-tanners use skin-loving ingredients, develop in hours instead of days, and deliver buildable, customizable color that doesn't look "fake" at all. Pair that with the right body bronzer for instant color and the right skincare foundation, and you've got a glow that can last a week or more.
At Everbeaut, we believe beautiful skin shouldn't come at the cost of its health — and sunless tanning is one of the best examples of beauty getting smarter, not harder.
Step 1: Prep Your Skin — This Is Everything
The number one reason sunless tans look patchy, orange, or uneven isn't the product — it's the skin underneath. Proper prep is the single most important step in the entire process, and most people skip it entirely.
Exfoliate 24–48 hours before application. Use a body scrub or exfoliating mitt to remove dead skin cells, paying extra attention to knees, elbows, ankles, and wrists — these areas tend to be drier and will absorb more color, leading to dark patches if not properly prepped. Don't exfoliate the day of application, as freshly exfoliated skin can sometimes be too sensitive and may absorb unevenly.
Shave or wax 24 hours before. Hair removal opens the hair follicles temporarily, which can cause the DHA in self-tanners to settle unevenly. Give your skin a full day to calm down before applying any tanning product.
Moisturize dry areas lightly before application. Elbows, knees, ankles, and the sides of your feet are naturally drier. Apply a thin layer of light moisturizer to these areas right before you apply your self-tanner to create a barrier that prevents over-absorption. But keep the rest of your skin clean and product-free — oils and heavy lotions will block your tan from developing properly.
Cleanse your skin thoroughly on the day of application. Remove any residue from deodorant, perfume, or body lotion before you start. These create an invisible barrier that causes uneven, spotty results.
Step 2: Choose the Right Sunless Tanning Formula for Your Skin Type
Not all self-tanners are created equal. In 2026, you have more formulas to choose from than ever, each with their own texture, depth, and finish.
Self-Tanning Mousse — The most popular format. Lightweight, fast-drying, and easy to apply evenly with a tanning mitt. Great for beginners and those who want buildable color. Apply in long, circular strokes and blend thoroughly at the joints.
Self-Tanning Drops — These are added directly to your favorite moisturizer or serum, giving you complete control over the depth of your tan. Ideal for sensitive skin types and those who want a subtle, gradual glow rather than a dramatic color change. They're also great for the face.
Gradual Tanning Moisturizer — A daily lotion with a small amount of DHA built in. Use it daily instead of your regular body lotion to build a natural-looking tan over 3–5 days. Perfect for those who don't want to commit to a full self-tanning session.
Self-Tanning Water — Ultra-light and buildable, these are sprayed directly onto skin and blended in. Great for a sheer, luminous glow rather than deep bronzing.
Self-Tanning Foam — Similar to mousse but slightly richer in texture. Often delivers deeper, longer-lasting color.
Pro tip: If you're new to self-tanning, start with a gradual formula or tanning drops mixed into your moisturizer. You'll get a feel for how the color develops on your skin before committing to a full mousse application.
Step 3: Application Technique for a Streak-Free, Natural-Looking Tan
This is where most people make their biggest mistakes. Follow these steps and you'll get professional-quality results at home every time.
Always use a tanning mitt. This is non-negotiable. A tanning mitt ensures even, streak-free application and protects your palms from staining. Apply product to the mitt, not directly to your skin.
Work in sections, bottom to top. Start with your feet and legs, then move up to your stomach and back, then your arms, chest, and shoulders. Finish with your neck and face (if using a face-safe formula). Working in sections ensures you don't miss spots and gives you time to blend each area before moving on.
Use long, sweeping strokes for flat surfaces; circular motions for joints. For your legs, arms, and torso, use long, even strokes that follow the natural line of your body. For your knees, elbows, and ankles, switch to circular buffing motions to prevent buildup.
Blend the edges carefully. The hairline, wrists, inner ankles, and along the sides of your hands are the most common areas where tans look obviously fake. Use whatever's left on your mitt after applying to each area to feather out the edges lightly.
Go lighter on "creased" areas. The back of your knees, the crooks of your elbows, and your inner wrists have thinner, more absorbent skin. Use a very light touch here, and consider blending with a barely-damp towel after application to prevent dark lines.
Wait for it to fully dry before dressing. Most modern self-tanners are dry to the touch in 5–10 minutes, but wait at least 30 minutes before getting dressed to prevent any transfer. Wear loose, dark clothing if possible for the first few hours of development.
Step 4: Body Bronzing for Instant Glow
Self-tanners give you a lasting color that develops over hours, but body bronzers give you instant, radiant glow you can build and wash off. Used together, they create a gorgeous layered effect that looks like you've been on vacation for two weeks.
Liquid Body Bronzer — Applied like a moisturizer, these contain shimmer particles and/or a temporary bronzing pigment that gives skin a lit-from-within glow immediately. Perfect for parties, nights out, or any time you need to look sun-kissed fast. They layer beautifully over a real or self-tan.
Powder Body Bronzer — A large bronzing powder or illuminating body powder swept over the shins, collarbones, shoulders, and décolletage creates an instant dimension and warmth. Use a large, fluffy brush for the most natural finish.
Shimmer Body Oil — One of the most popular body glow products in 2026. These oils contain light-catching shimmer particles that make every exposed area look longer, leaner, and sun-kissed. Apply to the legs, arms, and shoulders for a golden hour effect that lasts all evening.
Where to apply bronzer for the most flattering effect:
- Shins (not the full leg — just the front) for length
- Collarbones and shoulders for definition
- The bridge of the nose and temples for a natural, sun-kissed face look
- Cheekbones when used as a face bronzer
- Décolletage for an evening or special occasion look
Step 5: Make Your Tan Last Longer
A sunless tan typically lasts 5–10 days depending on your skin's rate of cell turnover. These habits will maximize how long yours looks flawless.
Moisturize every single day. Hydrated skin holds a tan significantly longer than dry skin. Use a rich body lotion daily, focusing on areas that tend to dry out faster like elbows, knees, and heels. Many people swear by using a gradual tanning lotion as their daily moisturizer to simultaneously maintain color while hydrating.
Pat dry instead of rubbing after showering. Rubbing your skin with a towel removes the top layer of dead skin cells faster, which means your tan fades more quickly. Pat skin gently to extend the life of your color.
Avoid long, hot baths and soaks. Hot water and extended soaking accelerates skin cell turnover and will visibly fade your tan faster. Keep showers short and use lukewarm water when you can.
Avoid exfoliating until you're ready to re-tan. Once you have a tan you love, skip the body scrubs and exfoliating mitts until the color has faded enough that you're ready to apply a fresh coat.
Top up every 5–7 days. Rather than waiting for your tan to completely fade, lightly reapply your self-tanner every 5–7 days to keep the color fresh and even.
The Role of Skincare & Supplements in a Better-Looking Tan
This is the part most tanning guides leave out entirely — but your skin's underlying health makes a huge difference in how a tan develops and how long it lasts.
Hydrated, healthy skin tans more evenly than dry, damaged, or sensitized skin. That means your daily skincare routine isn't separate from your tanning routine — it's the foundation of it.
Internally, supplements that support skin hydration, elasticity, and cell turnover create the ideal canvas for sunless tanning. Look for:
- Collagen peptides — support skin hydration and elasticity, giving your self-tan a more supple, natural-looking base
- Biotin — strengthens the skin's barrier function and supports overall skin health
- Hyaluronic acid (internal) — supports skin moisture from within, which directly impacts how long and evenly a tan holds
- Vitamin C — helps with overall skin brightness and clarity, making the golden undertones of a self-tan look more radiant against healthy, even-toned skin
At Everbeaut, our health and beauty supplement range supports the kind of radiant, healthy skin that makes every product — including your self-tanner — perform better. Explore our supplements collection to build your glow from the inside out.
Common Sunless Tanning Mistakes (and How to Fix Them)
Mistake: Orange palms. Fix: Always use a tanning mitt and wash your hands immediately after application.
Mistake: Dark knees, elbows, or ankles. Fix: Apply a thin layer of moisturizer to these areas before your self-tanner, and use circular buffing motions to blend rather than long strokes.
Mistake: Streaky legs. Fix: Make sure skin is fully exfoliated and dry before application. Apply with a mitt in long, even strokes and blend at the edges with whatever residue is left on the mitt.
Mistake: Tan rubs off on clothes and sheets. Fix: Wait at least 30 minutes before dressing (or longer for deeper formulas). Use a setting powder very lightly over self-tanned skin if you're wearing white or light-colored fabrics.
Mistake: Patchy fading. Fix: Moisturize daily and avoid harsh scrubbing. When you're ready to re-tan, exfoliate thoroughly to remove any uneven patches before applying a fresh coat.
Mistake: Color looks too dark or too orange. Fix: Choose a formula with a cool or neutral undertone (rather than warm/golden) for a more natural-looking result on your skin tone. You can also mix tanning drops into your moisturizer to control the depth of color.
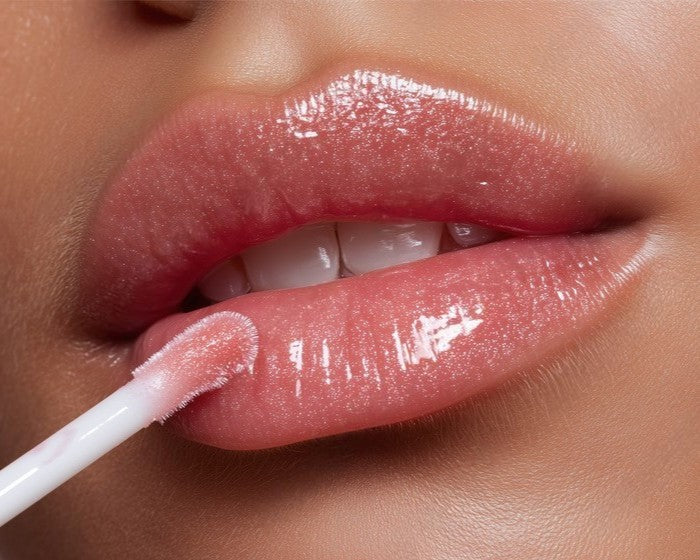
Bronzing Your Face: The Quick 2026 Guide
Face bronzing is a whole art unto itself — and done right, it's one of the most instantly flattering makeup techniques you can master.
For skin tone and depth, use a face self-tanner or tanning drops mixed into your moisturizer or serum. Apply to the areas where the sun naturally hits: forehead, the bridge of the nose, cheekbones, and chin. Blend thoroughly with clean fingertips or a damp beauty sponge.
For instant color and dimension, use a powder or cream bronzer in a shade 2–3 deeper than your natural skin tone. Apply to the same zones — forehead perimeter, cheekbones, nose, and chin — using a soft, fluffy brush. The key is blending: no harsh lines, no muddy patches, just a warm, sun-kissed warmth that reads as healthy and real.
For a luminous finish, add a highlighter to the tops of cheekbones, the brow bone, the bridge of the nose, and cupid's bow. This is what creates that lit-from-within, just-came-back-from-vacation glow that catches the light beautifully.
Your Summer Bronzing Toolkit: What to Look for When Shopping
Whether you're building your sunless tanning kit from scratch or upgrading what you already have, here's what to prioritize:
- A high-quality tanning mitt — the most important tool you can own for a streak-free result
- A self-tanning mousse or drops suited to your skin tone and desired depth
- A gradual tanning lotion for daily maintenance between full applications
- A shimmer body oil or liquid bronzer for instant, evening-ready glow
- A gentle, non-oil-based body scrub for pre-tan prep
- A rich, non-comedogenic body moisturizer to hydrate daily and extend tan life
- A face-safe bronzer in powder or cream form for makeup application
You'll find everything you need to build a complete summer glow kit at Everbeaut — from skin prep and body care to makeup and supplements that support your skin from the inside out. Browse our collection and build your perfect sun-kissed summer look starting today.
Final Thoughts: The Smartest Glow of Your Life
Sunless tanning in 2026 isn't a compromise — it's an upgrade. You get all the confidence and warmth of a beautiful bronze glow without the UV damage, without the skin aging, and without the risk. And with the right prep, formula, application technique, and maintenance routine, your glow can look genuinely, effortlessly natural all summer long.
The secret is in the details: exfoliate, hydrate, apply evenly, maintain daily. Master those four steps and you'll never have another streaky, patchy, or orange self-tan again.
Ready to glow? Shop Everbeaut's full body care and beauty collection and build the summer kit your skin deserves.
Written by Jake Mitzkovitz
